Table Of Content

Finally, add braces across either end of the bridge. Place the bricks on your work surface 4″ apart and make certain the long sides are parallel. Stand each truss vertically against a brick, and tape 3 of its web members to the brick. Use the utility knife to cut the balsa wood into 14 squares measuring 2″ on a side. Weave sticks 14 &15 under the orange stick and over the green stick.
Build the Bridge
You can experiment with various types of bridges such as suspension, arch, and beam bridges to see which plan provides maximum support. Note the clever use of strings in the suspension bridge idea. We love all kinds of STEM projects, but I think that mechanical engineering is my favorite. A few weeks ago, we saw a video on Facebook where a father and son built a da Vinci bridge out of lumber and broom handles. Aidan and I were fascinated by the design, and we decided to attempt building one on a smaller scale.
Step 1: Design Your Bridge.
Anyhow, assuming the cord does indeed have useful properties, the cord can be used to replace tensile members in the bridge. But I will also cut to the chase and let you know that in this simple case, the bottom members of the above trusses are always in tension. I did not build the physical model that you see me holding—a co-worker did, and he did not follow my directions perfectly.
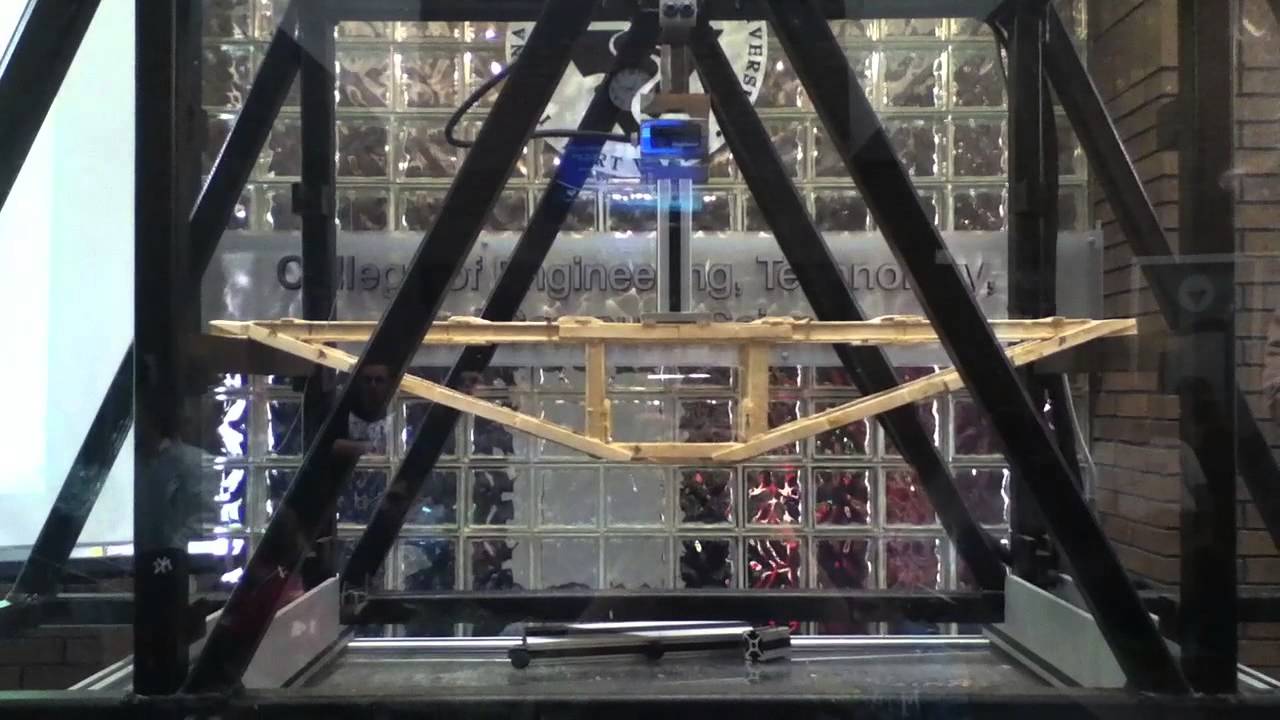
Providence Academy student’s popsicle stick bridge holds 1,170 lbs - KNWA
Providence Academy student’s popsicle stick bridge holds 1,170 lbs.
Posted: Fri, 18 Dec 2020 08:00:00 GMT [source]
Build a Da Vinci Bridge with Popsicle Sticks
Once it dries a for about 15 minutes, flip it over and repeat the triangular pattern on the other side to make it double thick. You will repeat this to make the two trusses for the sides of the bridge. Once the glue is all dried up, flip the bridge upside down and repeat steps 2 and 3. Before physically constructing the bridge, we decided to create computer generated sketches in order to have some blueprints and to see what was to be expected. The pictures above show the 4 sketches done. Which is how much one side of a triangle is holding.
Step 6: Adding the Top Layer
Kids Who Care: Students projects hope to handle pressure at bridge-building competition - WFFT FOX 55 Fort Wayne Indiana News & Weather
Kids Who Care: Students projects hope to handle pressure at bridge-building competition.
Posted: Wed, 06 Mar 2024 07:18:03 GMT [source]
Video highlighting the top three bridges from the Maine Transportation Conference Popsicle Stick Bridge Contest. These bridges are quite impressive, with the winner holding 1278 pounds before breaking. The commentary on this video contains useful observations and thoughtful opinions from the video makers. With the easy models and tips to guide you, you are all geared up to participate in bridge constructing activities.
more STEM PROJECTS from kids activities blog
Ensure that all sticks are in good condition. Secondly, cut your sticks to the required length using a sharp pair of scissors. Thirdly, glue your sticks together using the truss design that you have chosen.
Drew’s Science Project

As such, we need to design our bridge for the bending diagram and shear loading. I designed a quick one of these a few months back. It was for a presentation I gave for some middle-school students. To the left is an image of me holding the bridge.
For each layer, it doesn’t really matter if the next row of sticks are on the outsides of the previous ones or the inside. It’s your bridge, so you can either add weight until it eventually fails, or paint and display it as proof of your engineering abilities. You can use concrete blocks, barbell weights, buckets of water, or anything else flat and heavy. Add weight slowly and incrementally, and keep fingers and toes away from the area underneath the bridge. Distributing the weight evenly will allow you to add more weight before the structure fails.
Multiplying this by 2 reveals how much force is applied to both sides of the triangle, 67.38N. I started with each side of the bridge, keeping them symmetrical, then flipped each side and added more. I started by making smaller pieces that would be easier to glue together. I counted out how many I needed and started with that.
This will give you the base and two sides of the bridge all connected. To the left of the vertical beam, add an angled support with the bottom piece touching the bottom of the vertical beam. Repeat this on the right side of the middle vertical beam, having the bottom piece touch the bottom of the middle beam. Also check out my Fairy Tale STEM project with the Three Billy Goats Gruff for another idea to make a popsicle stick bridge. Remember above when I said we can focus primarily on the midspan? That is still true, but we do have to give our supports some thought.
Bridges made from popsicle sticks is a STEM activity for kids that will put their science, technology, engineering and math skills to the test in a playful way. These popsicle bridge ideas are great at home or in the classroom. An arch bridge with popsicle sticks can be a fun and easy project for kids and adults alike. It can serve as a simple introduction to the concepts of trusses and bridge-building, or as a challenging exercise in design and engineering. The box girder bridge design is less common than the truss and beam bridge designs, but it can be a good option for certain applications.


No comments:
Post a Comment